Pumpkin Chiffon Puffs

Pumpkin Chiffon Puffs

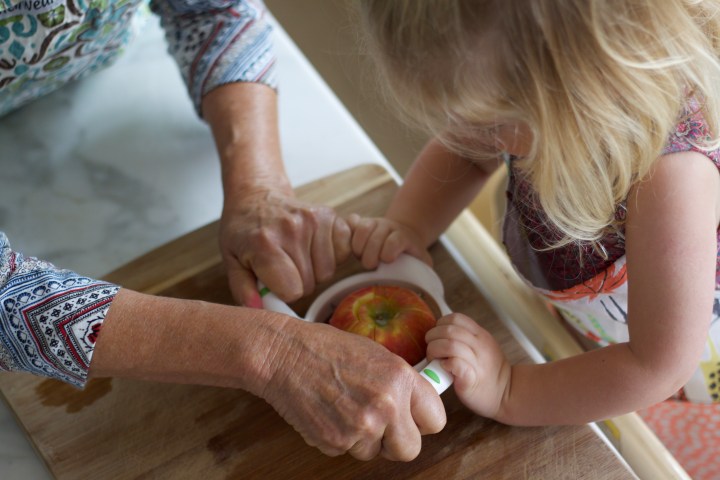
The love of cooking didn’t just start with The Cub in our family. We have a long history of creative chefs who whip up delicious recipes with such ease. Grandma DiDi, being one of them, dug up some old family recipes a few years back and found these Pumpkin Chiffon Puffs her Great Aunt Adele used to make. Older family members were delighted to have them back on the Thanksgiving Day menu and newer members enjoyed them just the same. These are delicious, and come in a handy single serving size!

Speaking of amazing cooks, Grandma DiDi recently joined the San Diego Cookbook Club. A once-a-month cooking club where members bring a dish from a cookbook they are reviewing. She delighted the members with two dishes; a Moroccan Butternut Squash and Goat Cheese Soup as well as a Leek and Potato Galette. After all members silently voted, Grandma DiDi won first place for her soup! Way to go! Click on the link above to get the recipes for the holidays!

pumpkin 1

Back to the Pumpkin Chiffon Puffs… The cub helped us by placing liners in each cupcake form. She had a choice between polka dots and stripes and she picked stripes!

Pumpkin 2

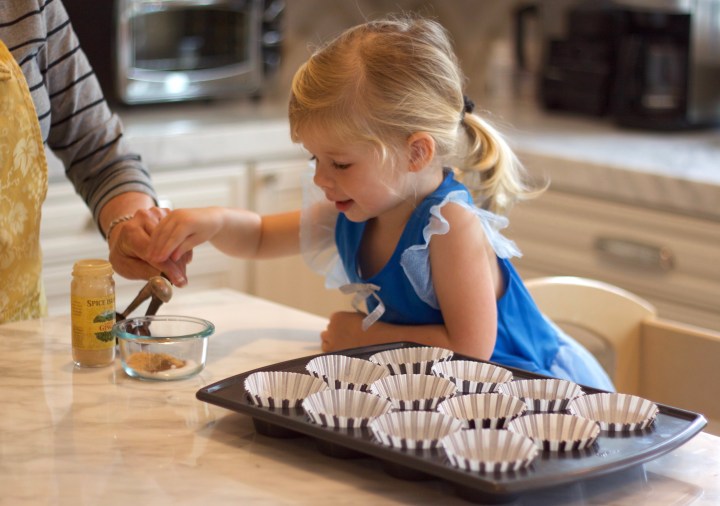
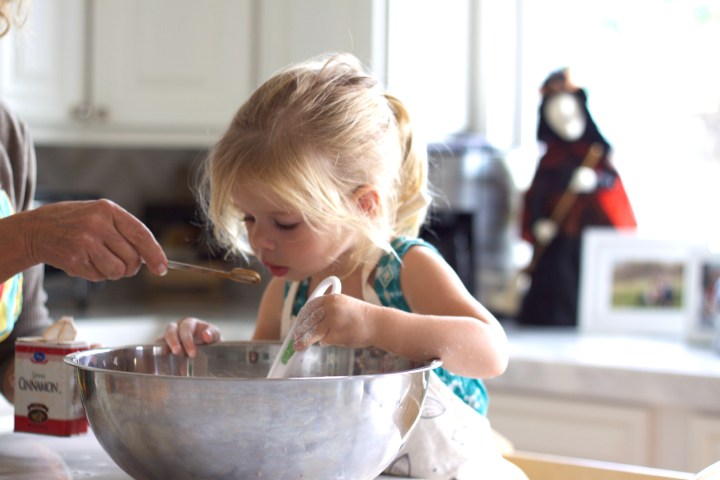
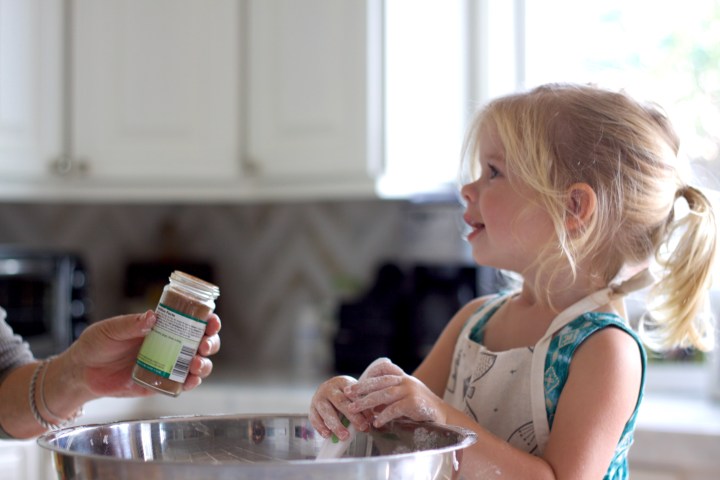
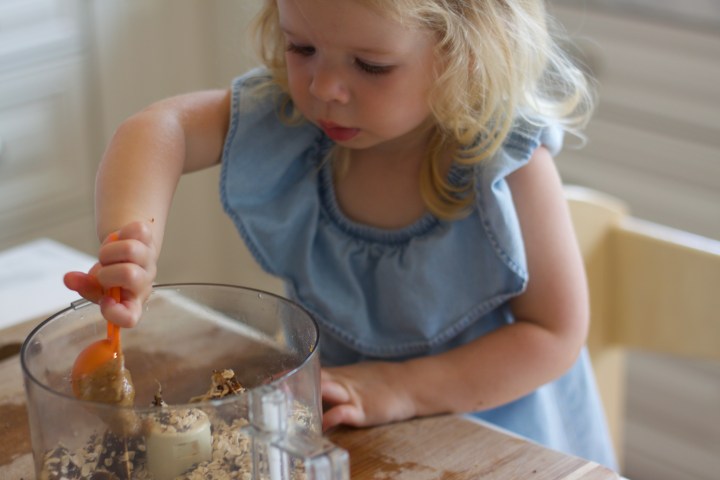
Next up, she helped measure the spices to add to the pumpkin mix, which was already on a double boiler over the stove.

pumpkin 6

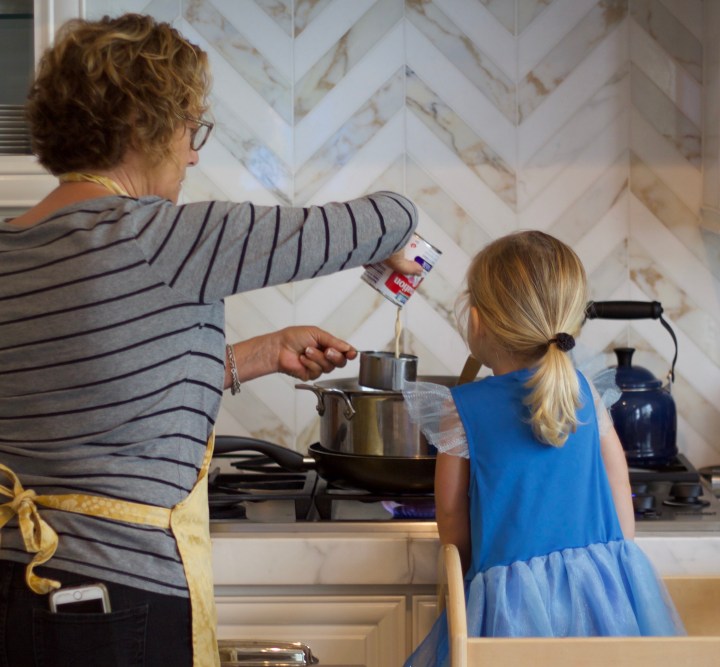
The cub watched as Grandma DiDi added all the ingredients to the pumpkin mixture.

pumpkin 7

Separating eggs is a fun sensory activity for toddlers. The cub really wanted to pour the egg yolks into the bowl after Grandma DiDi separated the whites.

pumpkin 8

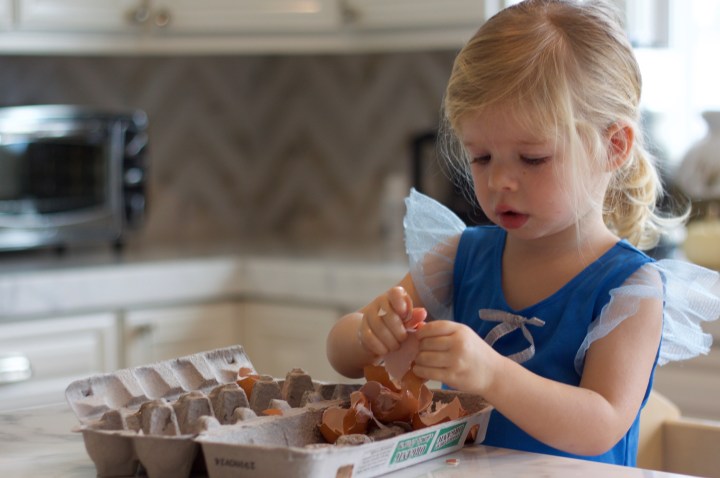
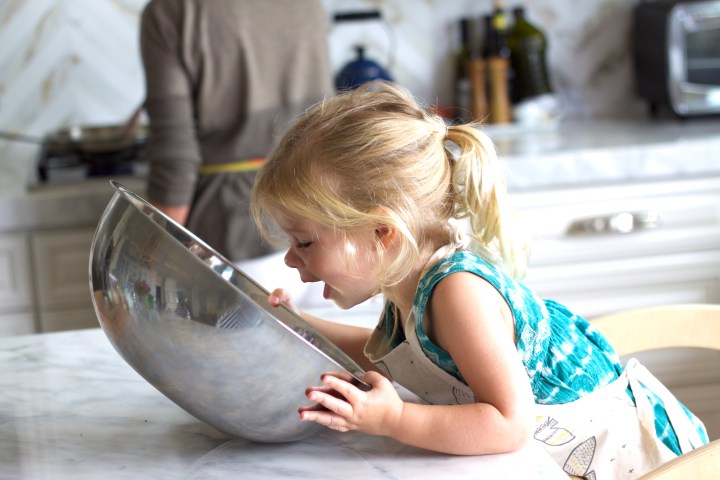
For a toddler, the best part of an egg is the shell. She kept herself busy breaking apart the shells while Grandma DiDi prepped the rest.

pumpkin 9

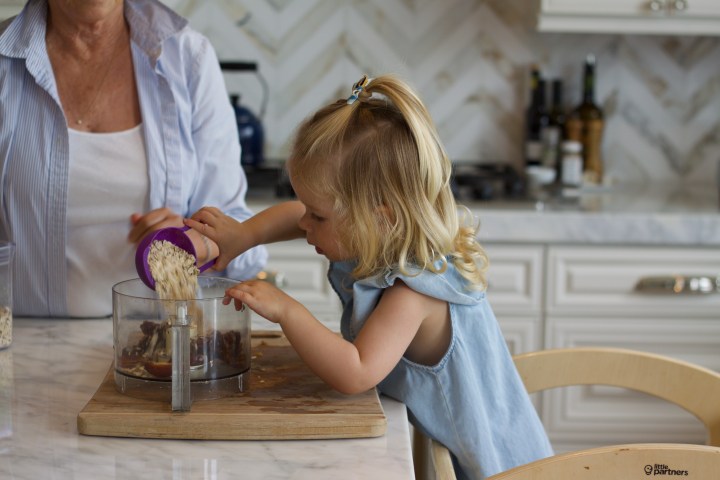
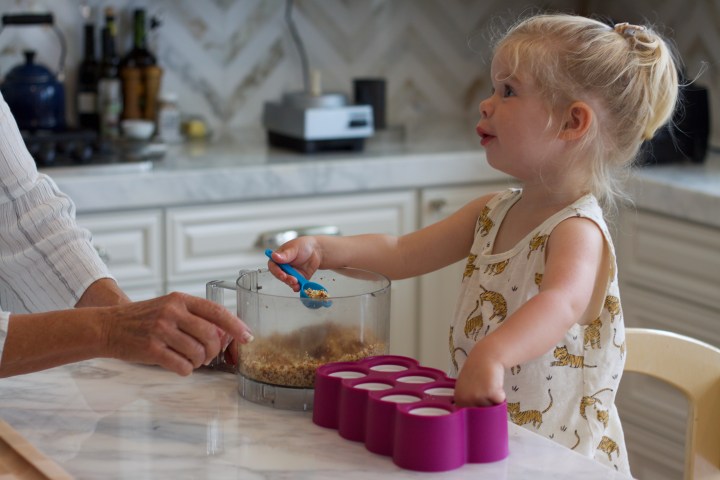
If you can’t find graham cracker crumbs in the store, make your own! We placed whole graham crackers in a plastic bag and used a rolling-pin to smash them. BIG fun for a toddler!

pumpkin 10

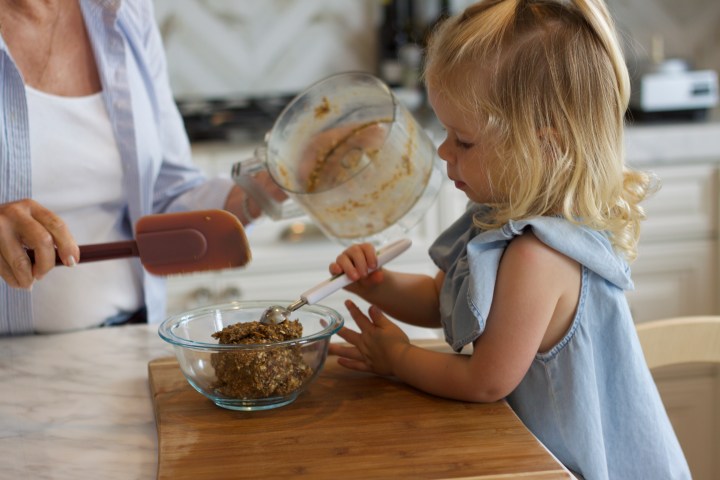
After the crust mixture was mixed, the cub helped Grandma DiDi press the crust into each liner. Lots of finger-licking fun!

pumpkin 11

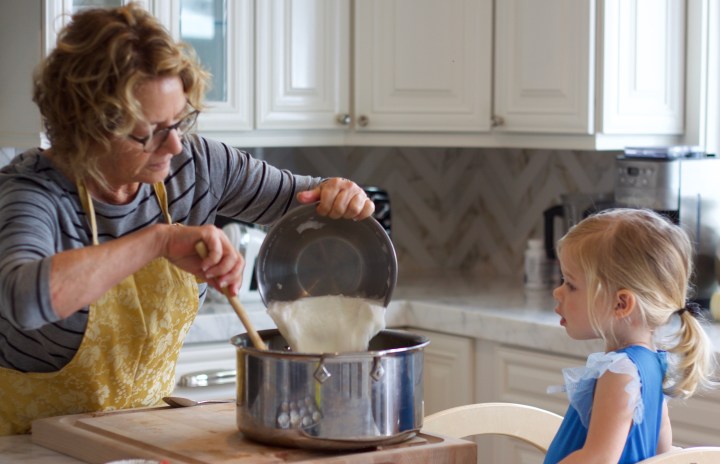
Now that the pumpkin mixture had cooled, Grandma DiDi whipped up the 8 egg whites she had set aside. In they go with the pumpkin mixture.

pumpkin 12

Then gently folded into each other until well mixed.

pumpkin 13

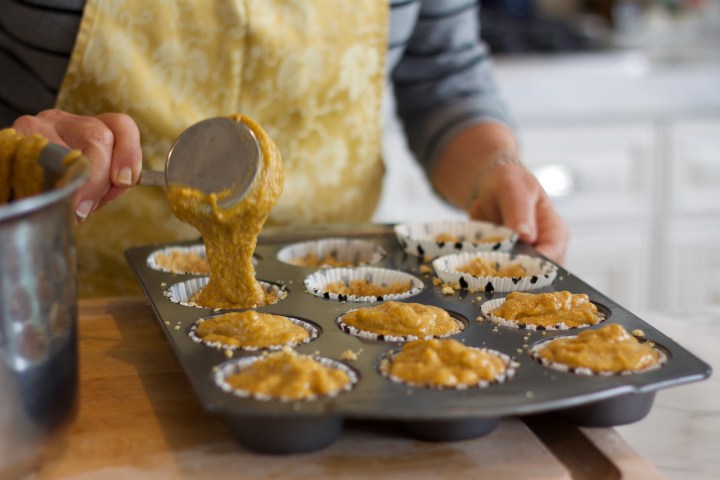
Last but not least, the pumpkin mixture goes into the forms and they are ready to bake. The oven should be nice and hot by now!

pumpkin 14

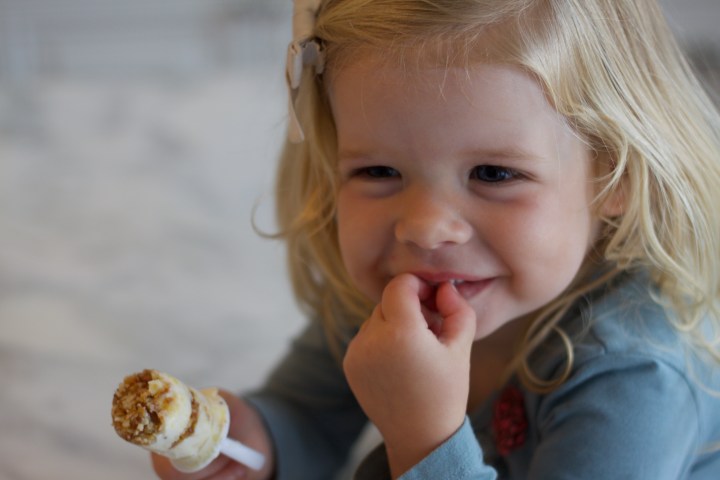
And there you have it! The most delicious, single-serve, melt-in-your-mouth pumpkin chiffon dessert to add to your holiday menu. It’s not Thanksgiving without these in our family.

Pumpkin Chiffon Puffs

Please know that there are several approximations in this recipe.  The original recipe found was not complete and it had to be made several times to get things right.

Ingredients

  • 7 cups (approx) graham cracker crumbs
  • 1 to 2 cubes butter – start with less and add what you need
  • 1 large can pumpkin puree
  • 1 can evaporated milk and enough regular milk to equal 2 1/2 cups milk total
  • 2 cups sugar
  • 1 tsp salt
  • 1 tsp cinnamon
  • 1 tsp ground ginger
  • 1/2 tsp cloves
  • 1 tbsp molasses
  • 8  large eggs separated
  • 4 tbsp flour
  • 1/4 cup (or more…) brandy
  • Whipped cream

Directions
makes approx. 30 puffs 

Set oven to 350 degrees.

  1. In a double boiler add pumpkin, all milk, 1 1/2 cups sugar (reserving the rest for the crust), spices, brandy and molasses and blend well. As it begins to heat add flour and whisk in along with the 8 egg yolks (after separating egg yolks, reserve the egg whites for later). Cook stirring occasionally until it thickens. About 10 – 15 minutes. At this point you can taste to add more brandy if desired. Remove from heat and allow to cool.
  2. As the pumpkin mixture cools, make the graham cracker crust. If you can’t find graham cracker crumbs (very rare these days), make your own crumbs in processor or in a plastic bag with a rolling-pin.
  3. Melt 1 cube of butter and add to crumbs with 1/2 cup sugar. Mix well. Add more butter if needed. It should be at a consistency that will stick together when compressed but not greasy.
  4. Line the cupcake tins with paper liners and carefully pack the crust mix into each cup. Get it as far up the sides as you can, but truthfully, they don’t always go up all the way and that’s okay – more room for the pumpkin.
  5. With the pumpkin mixture almost cooled, whip the egg whites until firm then fold them gently into the pumpkin mixture.
  6. Fill the cupcake tins to the top and bake 12 – 15 minutes at 350 degrees.  They will puff up like a soufflé immediately after cooking and then will drop after a while, but still taste yummy!
  7. Top with a dollop of whipped cream

*They can be stored in an air-tight container in the refrigerator for up to 4 days.

Brown Butter Pumpkin Cookies

Brown Butter Pumpkin Cookies

Hello pumpkin season and my favorite time of year! To get in the spirit of the season, we decided to make some delicious pumpkin cookies.

*Warning, these are full of all the delicious ingredients that make cookies so good. Nothing gluten-free, sugar-free, butter free about these bad boys. Because a real cookie should be enjoyed once and awhile! Cookie1

Cooking should always be fun. The cub quickly discovered her reflection in the mixing bowl. A silly conversation ensued.  In the background you can see Grandma DiDi browning the butter over the stove.

Cookie2

Grandma DiDi and the cub worked to add all the dry ingredients to the bowl. The cub helped stir while each one was added.

cookie9

Forget the spoon. Textures are fascinating to toddlers and they learn more by using their hands. The cub rubbed her hands in the flour, lifting it up and watching it fall through her fingers.

cookie3

In goes the cinnamon, but first, stop and smell it.

cookie4

Yum, that pumpkin pie spice smells delicious (and like my favorite season)!

cookie5

After deciding it was time to take her hair down, we were back to finishing the cookies. We mixed the wet ingredients and added raisins for flavor and texture.

cookie6

With curiosity, she watched Grandma Didi add all the wet ingredients to the dry ingredients.  We decided to also add a delicious new find from Trader Joe’s to this recipe.   Pumpkin spiced pumpkin seeds.

cookie7

Time to scoop them onto the cookie sheet. The cub enjoyed using the ice cream scooper to plop the dough on the cookie sheet.

cookie8

These smell as good as they look. The cub thoroughly enjoyed her treat and we were so thrilled to introduce her to a pumpkin cookies. Something we will be enjoying for years to come! Note – This recipe was adapted from sallysbakingaddiction.com


Brown Butter Pumpkin Cookies


Ingredients

  • 1 cup (2 sticks; 230g) unsalted butter
  • 2 cups (170g) old-fashioned whole rolled oats
  • 1 and 2/3 (208g) cup whole wheat flour (spoon & leveled)
  • 1 teaspoon baking soda
  • 1/2 teaspoon salt
  • 1 and 1/2 teaspoons ground cinnamon
  • 1 and 1/2 teaspoons pumpkin pie spice1
  • 3/4 cup (200g) granulated sugar
  • 1/2 cup (150g) packed light or dark brown sugar
  • 1 egg yolk, at room temperature
  • 2 teaspoons pure vanilla extract
  • 1 cup (228g) pumpkin puree ( not pumpkin pie filling and not the whole can) see note at bottom
  • Optional:   golden raisins and pumpkin spiced pumpkin seeds(or plain)

Directions

Preheat the oven to 350 degrees.
  1. Brown the butter: Slice the butter up into pieces and place in a light-colored skillet. (Light colored helps you determine when the butter begins browning.) Melt the butter over medium heat, stirring occasionally. Once melted, the butter will begin to foam. Keep stirring occasionally. After 5-8 minutes, the butter will begin browning– you’ll notice lightly browned specks begin to form at the bottom of the pan and it will have a nutty aroma.  Once browned, remove from heat immediately and allow to cool for 5 minutes.
  2. Meanwhile, whisk the oats, flour, baking soda, salt, cinnamon, and pumpkin pie spice together in a medium bowl.
  3. Pour the slightly cooled brown butter into a large bowl. Whisk in the granulated sugar and brown sugar until combined. Whisk in the egg yolk and vanilla extract until combined, then whisk in the blotted pumpkin (see note about blotting). Slowly mix the dry ingredients into the wet ingredients until combined. The cookie dough will be thick and sticky.
  4. Add optional ingredients at this time if you choose.
  5. Using a medium cookie scoop, scoop cookie dough into balls (about 2 heaping Tbsp of dough each) and place 3 inches apart on the cookie sheet. Slightly flatten the balls out as the cookies won’t spread much unless you help out first!
  6. Top with more pumpkin seeds
  7. Bake for 14-15 minutes or until lightly browned and set on the edges.    Cool and store in airtight container in refrigerator or freeze.

NOTE:   For chewier cookies blot the pumpkin in a paper towel lined strainer or bowl and let it sit for 1/2 hour or squeeze it so it becomes drier.

Emoji Ice Cubes

Emoji Ice Cubes

Who doesn’t love an Emoji?! And better yet, when they are used to add wholesome ingredients to your little one’s diet.  The cub loves juice (preferably the extra sugary kind), so we thought it would be fun to make juice ice cubes that she could add to her water that didn’t have all the added preservatives and sugar!

Engaging a child’s senses is the key to discovery. Drawing a child’s attention to the five senses and discussing them increases their understanding of, and communication about, the world around them. These ice cubes engage four of the five senses. They smell like fresh fruit, they look fun with funny faces and turn her clear water different colors, they feel cold (brrr!), and taste delicious.

We made two kinds of ice cubes. Apple cucumber and beet strawberry.

Ice cube

The cub started by washing the apple and the beet.

ice cube 1

Next up, we started chopping and prepping all the ingredients for the blender. She soon discovered how fun an apple corer can be and pushed extra hard to finish the job.

Ice cube 2

Surprise! Look what’s left!

Ice cubes 3

With her Curious Chef (kid safe) knife, the cub cut up the cucumber. We’ve been practicing and it shows! She’s really getting the hang of it.

ice cube 4

We added the cucumber and the apple to the blender to mix. Puree until smooth.

Ice Cube 5

We decided to fill half the Koji Cool Moji ice cube mold with the cucumber and apple mixture and the other half with the beet and strawberry mixture.

ice cube 6

The cub couldn’t wait to drink the leftover cucumber apple puree. She left Grandma DiDi to cut the strawberries.

ice cube 7

Back to work! After gulping down her juice, the cub is ready to do her part by cutting the strawberries. Grandma DiDi peeled and chopped the beet and added it to the blender. Emery added the strawberries and they were ready to mix.

ice cube 8

Into the ice cube mold it goes!

ice cube 10

Leftover beet and strawberry mixture didn’t stand a chance with this girl! Gulp, gulp, gone! We popped the ice cube mold into the freezer and let them set for 2 hours.

ice cube 11

Once frozen, the cub picked her favorite faces to add to her water. Healthy and fun water – it’s a win/win!


Emoji Ice Cubes


Ingredients

  • Apple
  • Cucumber
  • Beet
  • Strawberry
  • Water

Directions

  1. Wash all fruit and vegetables well
  2. Apple and cucumber blend:
    1. Cube equal portions of apple and cucumber and place into the blender
    2. Puree until smooth and pour into ice cube trays
    3. Add water, if necessary
    4. Note: Cute ice cube shapes and designs will enhance the taste!
  3. Strawberry and beet blend:
    1. Peel and chop beet and add to blender
    2. Slice the strawberries into quarters and add to the blender
    3. Puree until smooth and pour into ice cube trays
    4. Add water, if necessary
  4. Freeze for two hours and enjoy!

NOTES:

Use the proportion of each fruit or vegetable that you feel will entice your child to consume it. For example, we used about 1/3 of the medium-sized beet (raw) with about 1 1/2 cups of strawberries. Beet is a strong flavor and we wanted the strawberry taste to be up front. Possibilities are endless when thinking up new combinations.

Other optional additions: Honey, agave, spices or herbs of your choice


Nut Butter Date Bites

Nut Butter Date Bites

I recently took a trip to visit my family in Northern California. On that trip I was able to catch up with all my cousins who also have little ones of their own! As we sat at the park while our kiddos played, one of my cousins, Lea, who also happens to be a registered dietician, was feeding her one-year-old these date bites. I tried one and loved it, and knew The Kitchen Cub would, too.

You can read more about the amazing work my cousin does for the Bariatric community here.

Bite3

After the dates soaked for an hour, we started by having the cub help us take the pits out of the dates and chop them up. This is something she loves to do!

Bite2

She’s extra careful and working on watching her fingers while she chops.

Bite4

The cub helped us add all the chopped dates to the food processor. Next, in goes the oats.

Bite5

Then the chia seeds.

Bite6

And lastly, the nut butter. We used Trader Joe’s Mixed Nut Butter, which is a mixture of different nut butters. You can use peanut butter, almond butter or any nut butter you fancy.

Bite7

Put the top of the food processor on and pulse the mixture until it forms a ball of dough and all the ingredients look blended.

Bite8

Transfer to a bowl and start scooping.

Bite9

Grandma DiDi shows the cub how to roll them into balls between her palms. The cub is fascinated by this process!

bite10

“Now I try”, says the cub! She was so proud of her work. After you have rolled all the dough into balls, store them in the refrigerator.

bite11

But don’t forget the best part – eat one!

bite1

As you can see these are SIMPLE and easy to make. They are full of protein, vitamins, minerals, fiber, Omega 3 fatty acids, antioxidants, iron and calcium! They are easy to pack up for a snack and taste delicious!


Nut Butter Date Bites

Ingredients

  • 1 cup dates
  • 1/2 cup rolled oats
  • 2 tbs chia seeds
  • 2 tbs nut butter (Can be mixed, peanut, almond, cashew or any nut butter you like)

Directions

  1. Soak the dates in water for an hour.
  2. Remove pits and chop dates.
  3. Add dates, chia seeds, oats and nut butter to the food processor.
  4. Pulse the mixture until it forms a dough and all ingredients are mixed together.
  5. Transfer the dough to a bowl and start rolling the mixture into small bite-sized balls.
  6. Once you’ve rolled all of the dough into bite-sized balls, eat one, then store the rest in the refrigerator.


Berry Veggie Popsicle

Berry Veggie Popsicle

Did I mention we eat a lot of popsicles? We’re definitely on a popsicle kick with this heat! The cub helped Grandma DiDi create the perfect berry (with greens) popsicle. As always, no added sugar!

Popsicle2

Four whole ingredients, that’s it! Strawberries, blueberries, kale and broccoli.

popsicle4

First, we had the cub help us tear the kale off the stem. Drop the kale leaves in a bowl of cold water and clean the leaves thoroughly. Wash strawberries, blueberries and broccoli.

popsicle5

Have your cub add all the ingredients into your blender (or Vitamix in our case).  Add water or juice if you want it to be sweeter and blend.

popsicle6

The cub watches as Grandma DiDi pours the mixture into the Koji Popsicle Mold.

popsicle7

Have your cub help place the holders in each mold making sure that just a tiny bit squishes out the sides. Pop in the freezer for two hours and enjoy!

popsicle17

They are fruity and delicious and the perfect treat for a hot summer day. There is no easier way to get your little one to eat their veggies. Our cub has been eating these from day one and has no idea popsicles don’t usually include vegetables . Hoping to keep it this way for as long as possible!


Berry Veggie Popsicles

(Makes approximately 8 Koji popsicles)

Ingredients

1 cup strawberries
1 cup blueberries
1/4 cup raw broccoli
1/2 cup lightly packed raw kale
3/4 cup water (or juice of choice)

Directions

  1. Combine all ingredients in a blender or Vitamix.
  2. Blend and add more liquid if necessary.
  3. Pour mixture into popsicle mold.
  4. Drop popsicle handle in and make sure you can see through mixture lightly squish out the sides of the handle.
  5. Place in the freezer for two hours and enjoy!

*If you have extra mixture left over, serve it as a smoothie!

Piña Colada Popsicles (virgin, of course!)

Piña Colada Popsicles (virgin, of course!)

Summer is here and that means lots of popsicles in our home! We’ve been making our own popsicles since our little cub was teething. It’s a great way to sneak in some greens and of course, skip the sugar!

Grandma DiDi dreamed up these piña colada popsicles in a yoga class a few months back. She truly never stops thinking about food. 😉 We are thankful she had that moment in yoga because these are delicious! Not to mention they only take 10 minutes to make.

popsicle8

Seven ingredients, that’s it. Almonds, dates, pineapple, banana, coconut, yogurt and lime. Easy peasy!

popsicle9

We started with the cub cutting the dates in half and taking the pits out. Every little chef needs the right tools and we think Curious Chef makes great kitchen accessories for toddlers. They are not paying me to say that – I truly like them!

Back to the recipe – Pulse the almonds and dates until they are blended into a fine crumble.

popsicle10

We found the perfect popsicle mold at Target and they are just the right size for the cub. If you are in the market, they are called Koji Ring popsicle mold. You can also use an ice cube tray with popsicle sticks or your own favorite popsicle mold.

Grandma DiDi shows the cub how to scoop the almond and date mixture into the Koji Ring popsicle mold. The cub is excited to show Grandma DiDi which hole is next. After all the molds have a teaspoon of almond mixture, use the back of a spoon and press the crumble tightly into the form. Set aside the rest of the almond and date mixture as you will need it later.

popsicle12

Using your food processor again, have your cub help add the rest of the ingredients. Squeezing the lime juice was a fun and a new experience for the cub. Blend together until all ingredients are well-mixed. The pineapple can be in small chunks.

popsicle14

The cub scoops a teaspoon size dollop of the yogurt mixture into the mold. Repeat a layer of the almond and date mixture and then another layer of yogurt mixture.

popsicle13

Stop and taste your creation!

Lastly, place the mold handles on the top and make sure just a small amount of mixture squeezes out of the sides. Pop them in the freezer for two hours and then enjoy!

popsicle15

They are as delicious as they look. Hurry, go make some – your cubs will love them!

popsicle16

This cub sure does! Do you have a favorite popsicle recipe? We want to hear about them.

Piña Colada Popsicles

(Makes approximately 8 Koji popsicles)

Ingredients

1/2 cup nonfat greek yogurt
1 small banana
1/4 cup pineapple
1/2 tsp lime juice
1/8 cup sweetened coconut
1/2 cup slivered almonds
3 dates

Directions

  1. In a food processor combine dates and almonds. Process until mix is a fine crumble and set aside.
  2. Fill base of the popsicle mold with thin layer of almond/date mixture. With the back of a spoon, press the mixture down packing it tight.
  3. In the same mixer, blend yogurt, banana, pineapple, lime juice and coconut. Pineapple can be in small chunks.
  4. Layer with a scoop of yogurt mixture. Repeat the layers one more time.
  5. Drop popsicle handle in and make sure you can see the yogurt mixture lightly squish out the sides of the handle.
  6. Place in the freezer for two hours and enjoy!